Tagged: sewing tutorial

before & after: how to sew buttons to knitted garments
stitching buttons to knit tutorial

I’ve got a tiny, simple tutorial for you today. I know the experienced seamstresses among you will say to yourselves, really? that’s tutorial-worthy?, and my reply is, sure. Because I’ve got a soft spot for you newbies out there.

I was walking around Target yesterday, buying up clearance boys’ flannel shirts to which I’ll add a few darts and wear proudly. The boys’ shirts always end up with the better plaids, somehow, plus they’re longer. And since I’m buying in kids, they’re cheaper (as in, less than $4 each). As Michael Scott would say, this is a win-win-win solution.

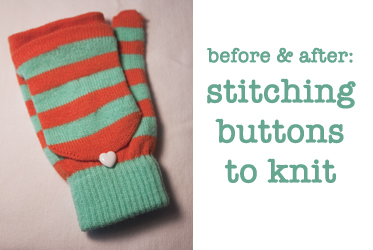
turquoise & orange striped gloves: beforeSuddenly I was hit with a revelation: what is it like to buy clothes when you can’t sew? How discouraged would I feel if I were forced to buy clothes exactly as they are, rather than buying them for what they could be? I can’t even imagine. I’m sure that I’d spend much more money on my clothes, and I wouldn’t be as happy, as me, wearing those clothes. So I’m planning a series of “before & after” tutorial/inspiration-based posts, meant to give a little push and instruction to those who might think “oh, but i’m not crafty”. Because modifying clothes, making them perfect for you, isn’t all that hard. And it is so very worth it.

So here’s a simple tutorial: how to stitch buttons to knitted garments. I found these convertible gloves, turquoise and orange stripe!, in the dollar spot. My favorite colors, but they had a black button! Who decided that? A change of button quickly carried these gloves to their full potential, and I’m hoping you’ll apply this simple technique to your gloves and cardigans so that they are perfect for you.

stitching buttons to knit: step 1

First, pick out a rather large needle. We’re going to be stitching through the gaps in the knit, so there’s no sense fussing with a tiny needle for this project! Cut a decent length of thread (16 inches or so, more if your button has 4 holes), and thread your needle – but don’t tie any knots.

stitching buttons to knit: step 2

Pick out the spot where you want your button to go, and insert the needle between the knit loops of yarn. You may have to stretch the fabric a little bit to find your hole, but you generally don’t want to have your thread go through the yarn because that can decrease the structural integrity of the knitted object. Be sure to leave a tail on the other side, see?

stitching buttons to knit: step 3

Pass your needle through your button, then go back into the knitted garment a few loops away from where you were before. Make sure your tail is still there on the other side!

stitching buttons to knit: step 4

Now take your tail and your “active” length of thread and tie them in a reef knot or two. Make sure the first knot is tight… this ensures that your button will not wobble around.

stitching buttons to knit: step 5

See? A nice tight knot. Don’t cut your tail!

stitching buttons to knit: step 6

Now keep going up through that first hole, through your button, and down through that second hole until your button is sturdily attached.

stitch buttons to knit: step 7

After you’ve done enough passes, pull your thread through to the back side and tie it to the tail again with a few more reef knots. Now you can trim both your tails! And you’re done!

stitching buttons to knit: finished

See? So much better than that plain black button.

sewing in striped gloves

And now I can sew in style. ;)

easy how-to: make mitred corners using bias tape

easy how-to: mitred corners using bias tape (a tutorial)

For some reason, I always thought that making mitred corners using bias tape would be really tricky. It turns out it’s super simple! Now you have no reason to fear binding around corners… using this tutorial, you can put bias tape on potholders, pockets, collars, you name it! Bias tape is just such a cute touch. This tutorial utilizes double-fold bias tape.

First, you want to have your fabric ready. This means if you want it quilted, you’ve already finished all that. Trim your edges to make sure all your corners are sharp, perfect 90-degree angles. Then cut a piece of bias tape that is long enough to go around all four sides of your piece, with some extra to overlap at the end.

It’s harder to start with the end, so I like to start somewhere in the middle. Usually I fold the tape in half to find the center, then place that in the center of one of the sides. That’s the side I start with.

Now let’s go!

mitred corners bias tape tutorial: step 1

Step 1: See how your bias tape is folded in half? One of these halves is more narrow than the other. Place the more narrow side on top: this ensures that the underside is caught even if your fabric is a little bit thick. Make sure the tape is on straight, then sew all the way down your first side.

mitred corners bias tape tutorial: step 2

Step 2: Fold your bias tape around the corner…

mitred corners bias tape tutorial: step 3

…line up the half that stays on the back…

mitred corners bias tape tutorial: step 4

…and Step 3: play with your corner until it looks like a pretty, clean mitred corner on both sides! At this point I like to give it a quick “stay there!” press with the iron… pins don’t do too well since there are too many layers and they just end up shifting things around.

mitred corners bias tape tutorial: step 5

Step 4: Sew all the way down your next side, starting with the anchoring stitch at your corner. Continue for all four sides!

Congratulations on some beautiful bias tape work!
mini potholders made using the mitred corners with bias tape tutorial

Ribbon Headband Tutorial

Fluffyland Ribbon Headband Tutorial

As I promised yesterday, here is a super quick and easy tutorial to teach you how to make a ribbon headband! This ribbon headband uses a small strip of elastic in the back to hold your hair better in place and, best of all, reduce the pain that typically prevents me from wearing headbands in the first place!

Here’s what you’ll need:

· Ribbon (about a yard)
· Elastic scrap (about 6″)
· Thread that matches your ribbon closely

Fluffyland Ribbon Headband Tutorial Supplies

Step 1: measure around your head where a headband would go. I got about 20 inches.

·   ·   ·

Step 2: Cut two pieces of ribbon to the same length, and cut a piece of elastic. You can use the same ribbon, or even make it reversible! But the ribbons should be the same width. I cut my ribbon to 16 inches each piece, and my elastic to 7 inches… compare your measurement from step 1 to mine and decide whether you would want more or less of either.

·   ·   ·

Fluffyland Ribbon Headband Tutorial

Step 3: Place one of your ribbon pieces right side up, and center the edge of your piece of elastic on top.

·   ·   ·

Fluffyland Ribbon Headband Tutorial - pinned

Step 4: Place the other piece of ribbon, right side down, on top of the elastic, to make a sandwich. Make sure it is well-aligned with the other piece of ribbon. Pin in place, then stitch across.

·   ·   ·

Fluffyland Ribbon Headband Tutorial step 4

Step 5: Repeat step 4 with the other end of your ribbons, making sure not to twist the ribbons. At the end of the step your ribbons & elastic should look something like this:

Fluffyland Ribbon Headband Tutorial step 5

·   ·   ·

Fluffyland Ribbon Headband Tutorial step 6

Step 6: At the ends where the elastic meets the ribbon, turn it ride-side out. Now, iron the crease flat where your ribbons touch. (be careful, because some ribbons highly dislike being ironed!)

·   ·   ·

Fluffyland Ribbon Headband Tutorial step 7

Step 7: Line up your ribbons so they are directly on top of each other, and topstitch close to each edge.

·   ·   ·

Fluffyland Ribbon Headband Tutorial

Step 8: You may want to press your headband quickly again if topstitching caused any slight wrinkles, but otherwise, you’re done! Enjoy!

I hope you liked this tutorial… these headbands are cute and simple, and would make a great gift accessory. I’d love to see pictures of your finished headbands! And, as always, your comments are welcomed and appreciated, so please let me know whether this tutorial was clear enough. Links back are very appreciated! Thanks!