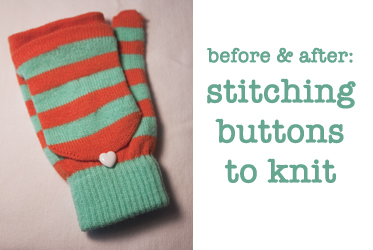
before & after: how to sew buttons to knitted garments

I’ve got a tiny, simple tutorial for you today. I know the experienced seamstresses among you will say to yourselves, really? that’s tutorial-worthy?, and my reply is, sure. Because I’ve got a soft spot for you newbies out there.
I was walking around Target yesterday, buying up clearance boys’ flannel shirts to which I’ll add a few darts and wear proudly. The boys’ shirts always end up with the better plaids, somehow, plus they’re longer. And since I’m buying in kids, they’re cheaper (as in, less than $4 each). As Michael Scott would say, this is a win-win-win solution.
 Suddenly I was hit with a revelation: what is it like to buy clothes when you can’t sew? How discouraged would I feel if I were forced to buy clothes exactly as they are, rather than buying them for what they could be? I can’t even imagine. I’m sure that I’d spend much more money on my clothes, and I wouldn’t be as happy, as me, wearing those clothes. So I’m planning a series of “before & after” tutorial/inspiration-based posts, meant to give a little push and instruction to those who might think “oh, but i’m not crafty”. Because modifying clothes, making them perfect for you, isn’t all that hard. And it is so very worth it.
So here’s a simple tutorial: how to stitch buttons to knitted garments. I found these convertible gloves, turquoise and orange stripe!, in the dollar spot. My favorite colors, but they had a black button! Who decided that? A change of button quickly carried these gloves to their full potential, and I’m hoping you’ll apply this simple technique to your gloves and cardigans so that they are perfect for you.

First, pick out a rather large needle. We’re going to be stitching through the gaps in the knit, so there’s no sense fussing with a tiny needle for this project! Cut a decent length of thread (16 inches or so, more if your button has 4 holes), and thread your needle – but don’t tie any knots.

Pick out the spot where you want your button to go, and insert the needle between the knit loops of yarn. You may have to stretch the fabric a little bit to find your hole, but you generally don’t want to have your thread go through the yarn because that can decrease the structural integrity of the knitted object. Be sure to leave a tail on the other side, see?

Pass your needle through your button, then go back into the knitted garment a few loops away from where you were before. Make sure your tail is still there on the other side!

Now take your tail and your “active” length of thread and tie them in a reef knot or two. Make sure the first knot is tight… this ensures that your button will not wobble around.

See? A nice tight knot. Don’t cut your tail!

Now keep going up through that first hole, through your button, and down through that second hole until your button is sturdily attached.

After you’ve done enough passes, pull your thread through to the back side and tie it to the tail again with a few more reef knots. Now you can trim both your tails! And you’re done!

See? So much better than that plain black button.

And now I can sew in style. ;)

 Lately I’ve been in a peculiarly fashion-conscious mood. While I like to think most of my outfits are fairly cute, they typically consist of jeans and either a
  I’ve been digging through the fabric bins, finally bringing a few of my visions to life. I’ve lost the long sleeve to my favorite and vastly edited


