Category: General

lazy friday, counting down.

lazy friday: stuffing tiny narwhals

It’s been an exhausting week. Exhausting in every sense. I finished the majority of my finals, papers, and projects, which took no small amount of time and concentration. But on top of that finals stress, I have this extra emotional layer. It’s a complex emotion, a savory blend of “you made it!” and “you’re leaving, goodbye.” I’m proud of what I’ve accomplished, and I’m certainly ready to graduate, and I’m certainly rejoicing that this is my last Finals Week. But that doesn’t mean I won’t miss school, and the person I am when I’m here. I hate the stress, but I love to learn. This emotional discomfort sits in the back of my head, causing me to toss and turn long after my bedtime. I’ve left this school for summer plenty of times, and I’m worried that this time it won’t feel different. I want it to feel different.

So today, after my German final, I treated myself to an afternoon of stuffing tiny narwhals in the sun against a pile of pillows. I have plenty of work to do yet this weekend, but I also have done plenty of work this week. I deserve a small mental (and emotional) break.

Happy Friday, everybody. You earned it!

glass blowing party

sam shaping a glass bowl - learning glass blowing

A few Fridays ago, I cashed in a sweet Groupon: a glass blowing party at J & C Glass Studio.

I’ve been slowly working my way up in the world of hot glass. First, of course, are the fusing experiments I’ve been doing in my kiln, which usually don’t go above 1600°F. This allows for a “full fuse”, meaning the glass layers meld into each other until they appear as one flat piece of glass. Next came a class on lampworking glass beads with a torch (also a groupon!): the torch can emit a flame of nearly 5000°F! But it is a small torch.

But the glassblowing furnace? It holds a pool of molten glass at around 2000°F. Two thousand degrees! Held constant throughout the entire furnace! That’s a lot of energy.

To make this bowl, we first dipped the end of the rod into the furnace of molten glass. All of the glass prepared for us in the furnace was clear glass – but in its molten state it was golden.

After collecting this blob of molten glass on the end of the rod/tube, we dipped it in yellow frit. Frit is tiny pieces of glass, ground almost to a powder, all of a uniform color. It’s used to easily provide precise color in hot glass projects – but for us, it’s what gives this bowl its swirly, spotty coloring because each little fleck melts smoothly into the molten surface.

Molten and fritted, it was time to blow the blob into a bulb. Blob to bulb to bowl! There’s a summary for you.

brad shaping a glass bowl - learning glass blowing

These pictures are actually in the wrong order – sorry Brad, I wanted to be at the top of the post! But the picture with Brad shows the bulb – it’s a blob of glass with a big air pocket inside. Once it’s big enough, the blowing part is done, and they actually stick it onto a second rod to start shaping the lip of the bowl.

That’s what I did. When I started at the bench seat, I had a rod (Rod #2) with a bulb – and the bulb had a tiny hole on the end from where it had been removed from Rod #1. The instructor made sure the rod was kept spinning constantly while I pulled the lip down with those giant tongs. Somewhere in there we dipped the rim in orange frit so that the bowl would have an orange rim.

What amazed me (and this shouldn’t have been a surprise, I know!), was how hot the glass was. My arm was over the bowl as I used the tongs, and I thought I was being burned just from the heat emanating from the molten bowl. Brad felt the same way – he thought the hair on his arms was about to catch fire! When I got home, my arm was red and splotchy, like I had been sunburned. But it was fine by morning. I wasn’t worried, exactly, but it was a little bit painful! I gained a new respect for the artists who work at that studio every day.

Once the bowl was appropriately sized and shaped, we removed it from the rod (accomplished using precise drips of water and a firm tap!) and it went into the kiln to be annealed – cooled slowly to prevent stress fracture. The whole process, from blob to bulb to bowl, took less than 15 minutes. With molten glass, you have to work fast!

Last week, we got to go pick it up! We hadn’t seen it in a not-molten state, of course, so we were very excited.

handmade yellow & orange glass bowl  - matches my curtains

As you can see, it matches my curtains quite nicely.

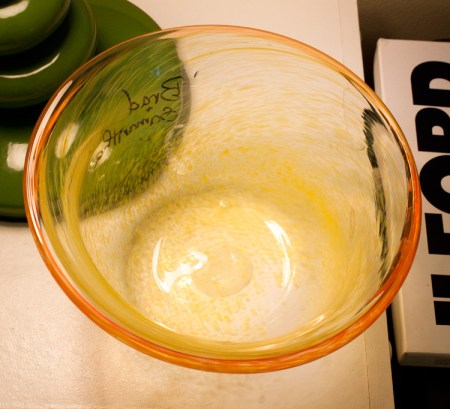
handmade yellow & orange glass bowl

And yes, it’s a little bit lopsided. But not very! Also – it’s pretty big! The diameter at the widest point of the lip is nearly 7 inches. So it can fit lots of snacks.

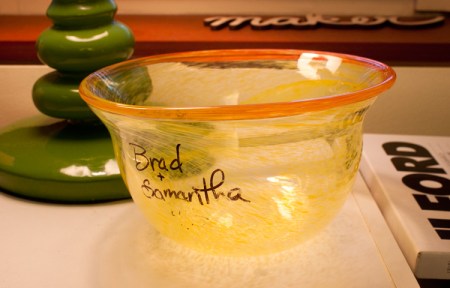
glass bowl made by brad & samantha

Our names can be easily removed, but I haven’t wanted to do so yet. I rather like them there, because it proves, hey, we made this.

It was really fun to take time out from a busy week and go Make Something New. I love that feeling. It was tricky – glassblowing is certainly an advanced art, and we had lots of help – but it was fun. I can’t wait to do more hot glass projects in my kiln this summer. And I can’t wait to eat lots of snacks out of this beautiful bowl.


make a dorm feel like home: dorm room curtains

Dorm rooms are challenging. They’re temporary, and typically bland – sometimes actively ugly. Between dorm regulations, car space, and college-kid budget, it’s hard to make a dorm feel like a great place to live. But for me, especially since at school I need to be able to focus and get work done, I want to feel comfortable and “at home” in my room.

light shining through last year's dorm room curtains (made from a vintage sheet)

I recently posted about this year’s thrifted vintage curtains, and how cozy they make my room feel. I believe that curtains are one of the easiest, cheapest, and most effective ways to make a room feel like your room.

For me, a vintagey/grandmotherly fabric helps. But that’s optional.

light shining through last year's dorm room curtains (made from a vintage sheet)

This year, I was lucky enough to find perfectly-sized, pre-made curtains at the thrift store. But last year, I just chopped into a vintage sheet to make my own. Simple curtains like these are one of the easiest projects I can think of. So here’s how to make yours!

Supplies:

  • curtain fabric (I used a vintage sheet), $2.50
  • lining fabric* (white cotton is cheap, or you can buy curtain lining fabric), $5
  • tension rod (sized to your window), $10

*I did not line these curtains! I wanted to let some sunlight come through.

vintage sheets waiting to become curtains

To determine your measurements:
Measure the width of your window, and then decide on a length. The length is up to you.

Width

  1. Number of panels
    For two panels, like mine in these photos, start by dividing the window width by 2.

  2. Gathered Look
    You always want your curtains to be sized slightly bigger than your window so they gather a bit at the top – I did not add enough fabric, which is why these curtains look so flat. So add at least 10% to your width to allow for gathers.

  3. Hems
    Finally, add 4″ to each panel (2″ per edge) to allow for hemming the sides of each panel.

Total Panel Width = 1/2(WindowWidth) + 1/10(WindowWidth) + 4″

Length

  1. What length?
    It’s a dorm room, so any length of curtains will look better than no curtains. You can decide this based on your fabric or based on how much coverage you want – basically, it’s up to you.

  2. Tension Rod looping
    Allow enough extra fabric that you will be able to slide the curtain easily over the tension rod. Usually a 4″ fold will suffice.

  3. Bottom Hem*
    Curtains look much classier if you allow for a 4″ hem or so – that’s what I did, and see how nice they look?
    *If you’re lining your curtains, you don’t need to add this measurement.

Total Panel Length = Your Length + Rod Loop + Bottom Hem

Hopefully, your Panel Width will be less than the width of your fabric. Then, you just need to buy a length of fabric that is twice your calculated length.

From there, it’s super easy.

Making Unlined Curtains

  1. Cut panels of fabric to your determined length and width.
  2. Hem sides of panels: turn under 3/8″, turn under again 1″, and then stitch.
  3. Create tension rod loop by turning under a small hem (3/8″) and then folding over an amount that will allow your tension rod to clear. Stitch in place.
  4. Hem, making sure both panels line up straight.

That’s it!

Making Lined Curtains

  1. Cut panels of both fabric and lining to your determined length and width.
  2. Stitch panels right-to-right, leaving a gap on the top edge for turning right-side-out.
  3. Create tension rod loop by folding over an amount that will allow your tension rod to clear and stitch it in place. You should be able to incorporate your turning hole here, stitching it shut as you stitch down the line.
  4. Optional: Topstitch 4″ above bottom as a pseudo-hem line – it will look nicer. You may also want to topstitch along your other two edges, but don’t stitch the rod hole shut!

That’s it!

The best part, is that when it’s time to pack up and go home for the summer, curtains can just be folded up and thrown in a box. Try doing that with a poster! Tension rods aren’t hard to transport either.

Curtains help cover those awful dorm blinds, and they give the room a depth that only fabric can provide. They’re cheap and easy, and they make my room feel so much nicer!

I hope you have the chance to make your own, and I hope you love them as much as I do!